
How to set up product rentals on Shopify
By Rakun Digital · Published October 6, 2026
Shopify is built to sell things once. Renting asks for more: the customer picks a start and end date, the price depends on how long they keep the item, the same unit cannot go out twice on the same day, and you often want a refundable deposit on top. Shopify has no rental mode, so you need an app that adds dates, availability, and duration pricing while keeping the normal checkout.
This guide walks through a complete setup with RD Rentals, from choosing what to rent to a first test booking. It describes the app as it works today, including what it does not do.
Before you start: decisions to make
Decide these first. You can change all of them later.
- Which variants are rentable. Rental settings live on variants, not on the whole product. A camera body and a camera kit can be two variants with different rates and stock.
- Rent only, or rent and buy. Some items you only rent. Others you sell new and rent as well. RD Rentals supports both on the same variant.
- The daily rate. Pricing starts from a rate per day. Longer rentals can get cheaper day bands (pricing tiers), covered below.
- How many units you own. This is the number of identical items you can have out at the same time.
- Turnaround time. How many days you need after a return to inspect, clean, or ship the item before it can go out again.
- Deposit. Whether you charge a refundable security deposit and how much. See the deposits and damage policy guide for refunds and customer-facing policy.
Step 1: Install RD Rentals and open the setup guide
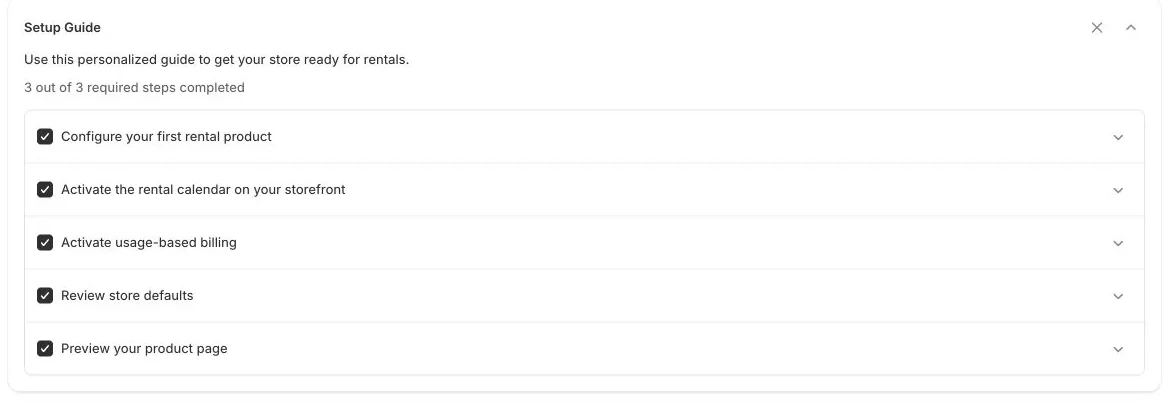
Install RD Rentals from the Shopify App Store and open it from your Shopify admin. The app opens a setup guide and keeps you there until the required steps are done. The guide has three required steps and two optional ones:
- Configure your first rental product (required).
- Activate the rental calendar on your storefront (required).
- Activate usage-based billing (required).
- Review store defaults (optional).
- Preview your product page (optional).
There is no monthly fee. The first 10 paid rental orders each month are free, and each paid rental order after that costs $0.50, billed through your Shopify invoice. Unpaid orders do not bill. Compare monthly plans.
Step 2: Add your first rental product
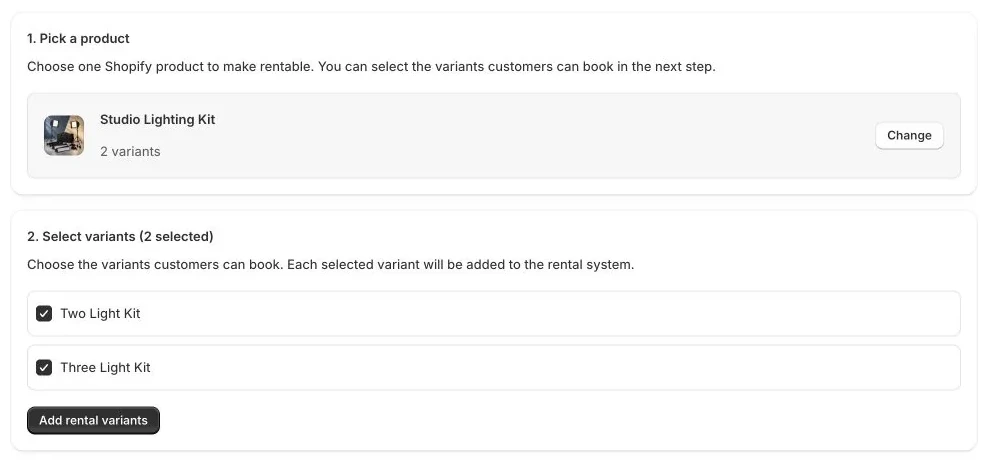
In the app, go to Products and choose Add rental product. The page has two parts:
- 1. Pick a product. Use Browse products to open the Shopify product picker and choose one product from your catalog. The product must already exist in Shopify. Change swaps it.
- 2. Select variants. Tick the variants you want to rent, then choose Add rental variants.
Each new rental variant starts with sensible defaults: the purchase option is rent only, the daily rate is copied from the variant's current Shopify price, the total units is 1, and the deposit and buffer days come from your store defaults. Review them in the next step.
To set up many products, Add multiple on the Products page picks several at once; each still gets its own settings.
Step 3: Configure rental settings for each variant
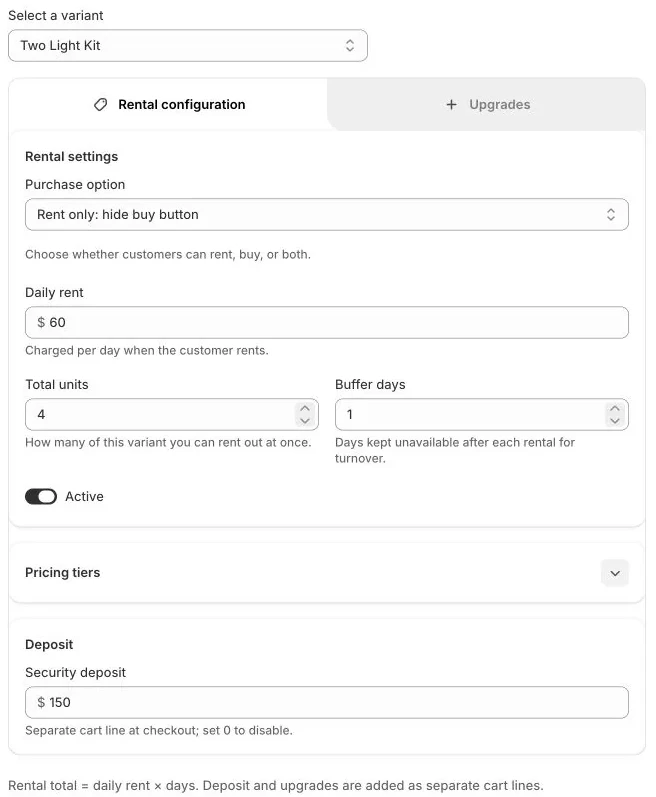
After adding, you land on the product's configuration page. Use Select a variant to switch between variants. The Rental configuration tab holds the core settings:
| Setting | What it does |
|---|---|
| Purchase option | Both: rent and buy shows the rental calendar and keeps the normal buy button. Rent only: hide buy button hides the theme's buy button. Sell only: hide rental widget turns the variant back into a normal product. |
| Sale price | The purchase price when the variant can also be bought. |
| Daily rent | Charged per day when the customer rents. |
| Total units | How many of this variant you can rent out at once (at least 1). |
| Buffer days | Days kept unavailable after each rental for turnover (0 or more). |
| Active | Switches renting on or off for this variant without deleting its settings. |
With Rent only, the app also sets the Shopify variant price to the daily rent, so collection pages and search results show the price per day.
Step 4 (optional): Add pricing tiers for longer rentals
Without tiers, the rental price is simply daily rent times the number of days. Pricing tiers let longer rentals cost less per day. Open Pricing tiers on the variant and either choose Add tier to build bands by hand or Suggest tiers for a starting set.
Each tier has a From day, a To day (leave it blank on the last tier to make it open-ended), and a rate. The rate is either a Fixed amount per day or a Percent of base, a percentage of the daily rent. The first tier must start at day 1, tiers cannot overlap or leave gaps, and only the last tier can be open-ended.
Tiers are progressive. Each day is charged at the rate of the band it falls in, the way tax brackets work, rather than the whole rental moving to a cheaper rate. Here is what Suggest tiers produces for a variant with a daily rent of $40:
| Days | Rate | Per day |
|---|---|---|
| 1 to 3 | 100% of base | $40 |
| 4 to 7 | 85% of base | $34 |
| 8 to 14 | 70% of base | $28 |
| 15 and up | 55% of base | $22 |
A 10-day rental then costs 3 × $40 + 4 × $34 + 3 × $28 = $340, instead of $400 at the flat daily rate. Adjust the percentages to your margins.
Step 5 (optional): Set a deposit and add upgrades
Under Deposit, the Security deposit field sets a flat refundable amount per unit. Set it to 0 to turn the deposit off for that variant. The deposit is charged at checkout with the rental, as a separate cart line rather than part of the rental price, and you refund it from the Shopify order when the item comes back. The deposits and damage policy guide walks through checkout, deposit-only refunds, and what to publish in your store policies.
The Upgrades tab is for optional extras customers can pick on the calendar, such as a spare battery or a carry case. Choose Add upgrade to create one with a name, price, description, and optional image, or From library to reuse an upgrade you already made for another product.
Step 6: Turn on the rental calendar in your theme
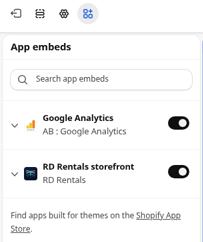
Customers book through a calendar on the product page. To show it, open your theme editor in Shopify (Online Store, then Themes, then Customize), go to App embeds, and turn on RD Rentals storefront. Save the theme. The embed adds the calendar to every rental product page automatically, with no theme code edits.
If you want the calendar in a specific spot, add the Rental calendar block to your product template instead. In the block settings you can rename the heading and labels, change the button text (Rent now by default), choose whether weeks start on Monday or Sunday, and pick an appearance: Match theme or Classic teal, with optional colors, font scale, and custom CSS.
The embed and block are built for Online Store 2.0 themes, which support app embeds and app blocks. That covers Shopify's free themes, including Horizon and its siblings such as Tinker and Fabric, and Dawn, plus premium 2.0 themes such as Impulse, Prestige, and Impact. They are compatible by design; we have not tested each one. Vintage (pre-2.0) themes cannot use the block, but the embed may still place the calendar next to the add-to-cart button, so check a product page. If the calendar does not appear, contact us through the app's support chat or at [email protected].
Step 7: Activate billing and review store defaults
Approve usage-based billing when the setup guide asks for it. Shopify shows the charges before you accept.
Then open Settings in the app. The Rental settings page holds two store-wide defaults that are copied into new rental products:
- Booking buffer in minutes (0 to 1,440): time added between bookings for preparation, cleaning, or handover. New variants get this rounded up to whole buffer days, so any value above 0 gives new variants 1 buffer day.
- Default deposit: copied into new rental variants as their Security deposit.
Product-specific settings always take priority, so changing a default later does not rewrite products you already configured. If you close on certain dates, set them up under Blackouts; the availability guide explains how.
Step 8: Preview and place a test booking
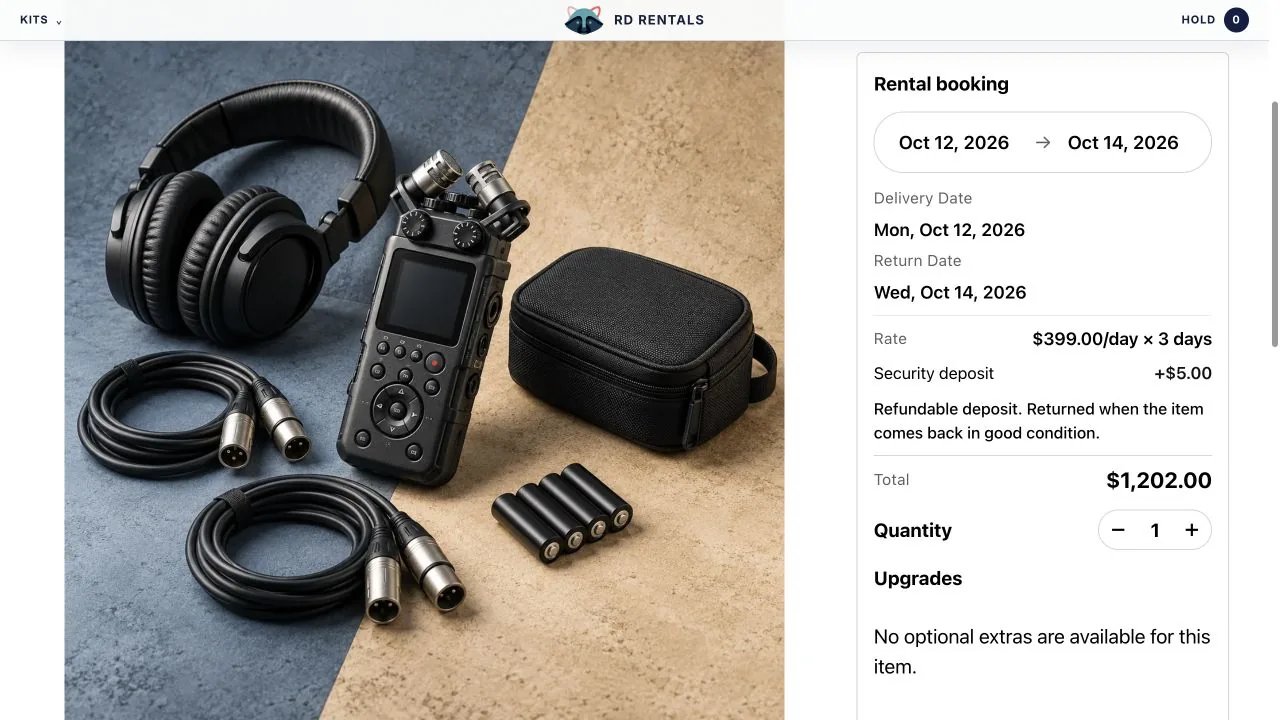
Open a rental product on your storefront and pick start and end dates. Both ends count, so Monday to Wednesday is 3 days. The summary shows the delivery and return dates, rate × days, any upgrades, the refundable deposit, and the total. If you ask for more units than are free, the calendar says how many are available.
Then place a test order, in a development store or with payments in test mode:
- In Settings, then Payments, activate Shopify's Test payment gateway (formerly Bogus Gateway) or turn on Shopify Payments test mode.
- Book future dates and check out with test card data:
1as the card number on the test gateway, or 4242 4242 4242 4242 in Shopify Payments test mode, with any future expiry and CVV. - Check that the booking appears under Bookings; a paid order shows as confirmed.
- Cancel the order in Shopify and refund it in the same step. Cancelling releases the dates; a refund alone does not.
- Turn test mode off before you take real orders.
Checkout prices come from your rental settings, so customers cannot change them in the browser. An unpaid order shows as Awaiting payment and holds the dates for a limited time without billing you. Each booking links to its Shopify order, which gets rental start and end dates you can filter on in Orders.
Running rentals day to day
- Bookings list. Search all bookings, filter by status (awaiting payment, confirmed, active, returned, cancelled, hold expired), and sort by dates, product, or status.
- Going out. A booking becomes active when you fulfill its Shopify order.
- Coming back. Use Mark returned on the booking. Returned bookings stop blocking the calendar, so an early return frees the remaining dates.
- Cancelling. Cancel the order in Shopify. The booking is cancelled and its dates are released. A refund on its own does not release dates; the booking shows a reminder to cancel the order if that is what you meant.
What RD Rentals does not do
RD Rentals does not generate rental contracts or collect e-signatures, does not send pickup or return reminders, has no customer account portal for bookings, and does not charge late fees or damage fees automatically. Deposits are refunded by you from the Shopify order. Handle these with your existing tools.
Launch checklist
- Every rentable variant has the right purchase option, daily rent, total units, and buffer days.
- Shopify inventory tracking is off for rentable variants.
- Pricing tiers, if used, start at day 1 and have no gaps.
- The deposit amount matches the policy you show customers.
- The RD Rentals storefront app embed is on and the theme is saved.
- Usage-based billing is approved.
- Blackout dates for closures are in place.
- A test order went through and appeared under Bookings.